What we need before creating an online marketplace?
Before creating a multi-vendors or marketplace website, you need to have elements such as below:- A domain and hosting
- A WordPress theme (supporting WooCommerce & multivendor plugins)
- WooCommerce plugin
- A multi-vendor plugin
How to create online marketplace with WooCommerce?
With all essential points as above, now we can start the very first steps to build a marketplace WordPress site.1. Installing WordPress website
With your own hosting and domain, you can build a WordPress website on your server.There are some way for you to perform this task and it may due to different hosting provider. However, you can visit WordPress official website if you get any trouble during this process.
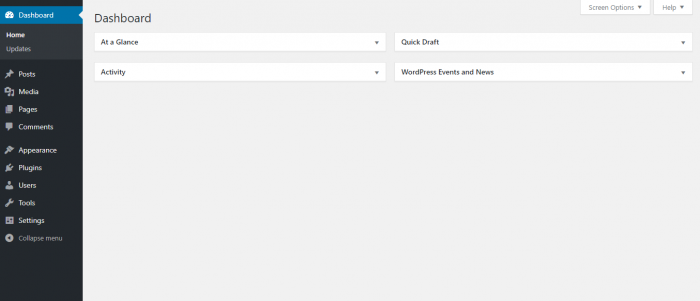
After finishing, you can login your site at https://yoursite.com/wp-admin and enter the username and password to access the Dashboard.
2. Install WooCommerce plugin
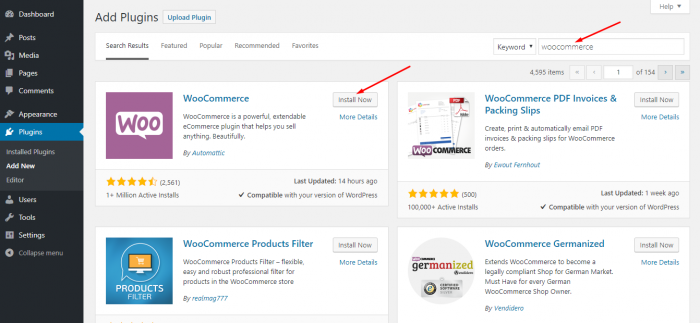
To turn your site into eCommerce platform, we need to use WooCommerce plugin. We can download WooCommerce from WordPress Plugin Directory.Please go to Plugins > Add New then search for "woocommerce" and click Install then Activate this plugin.
Now, your site becomes an ecommerce site. You can upload products to sell there. However, with WooCommerce, this site is an online store with a shop. Now we need to continue with the next steps.
3. Turn WooCommerce site into marketplace
After installing WordPress themes with WooCommerce ready, we need to do some basic configurations to turn a website into an online marketplace. That's installing multi-vendor or marketplace plugin.Currently we have lots of plugins that you can use for your site. We recommend Dokan Multivendor, WC Vendors and WC Marketplace plugins as one of the best multi-vendor plugins for WordPress site. In this article, we will take Dokan Multivendors as an example.
Similarly as installing WooCommerce, we can also download Dokan Multivendors from WordPress Plugin Directory. Please go to Plugins > Add New then search for "dokan" and click Install then Activate this plugin.
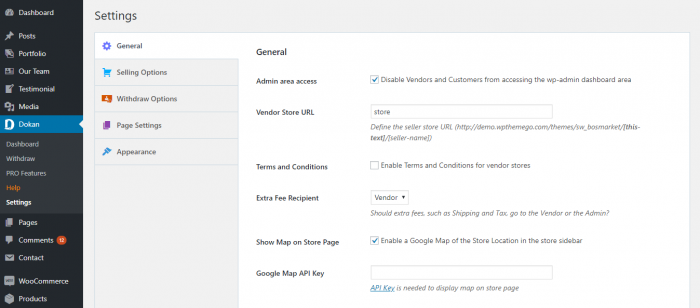
After that, you can go to Dokan > Settings to do some general and other configuration for your marketplace.
4. Enable Account Management
To let other to register in your marketplace, you need to visit WooCommerce > Settings page and click on the ‘Accounts’ tab. From here you need to check the boxes next to customer registration option.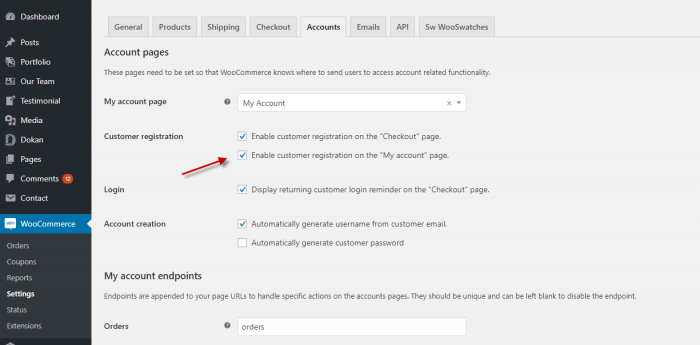
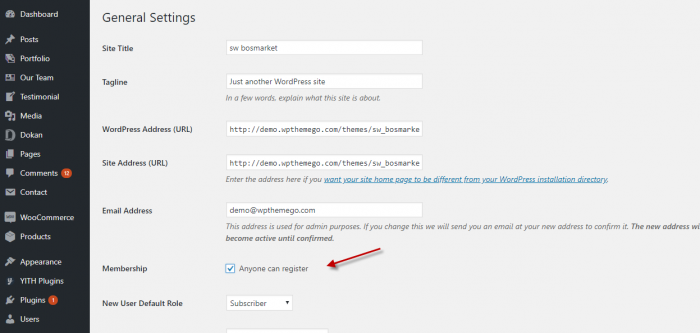
Also, you need to make sure that you enable Anyone can register box for Membership options in General > Settings.
5. Setting up navigation menu
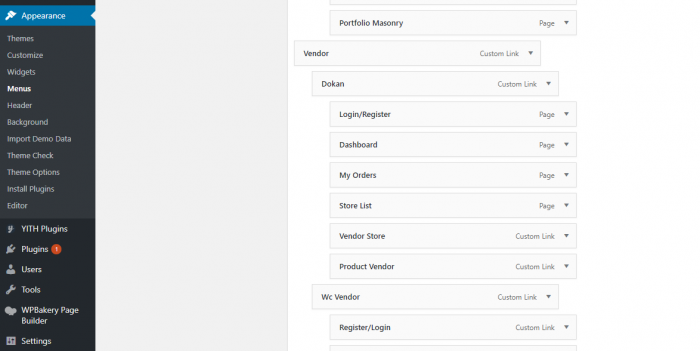
Now all is about to finish. We need to create a menu then your user can find the way into the vendor stores.To do that, you need to visit Appearance » Menus page. You will need to add your user account and checkout pages to the navigation menu.
6. Testing your marketplace
Finally, we can go to the site at front end and register as a vendor, approve it as site owner then try to upload products into the vendor store.
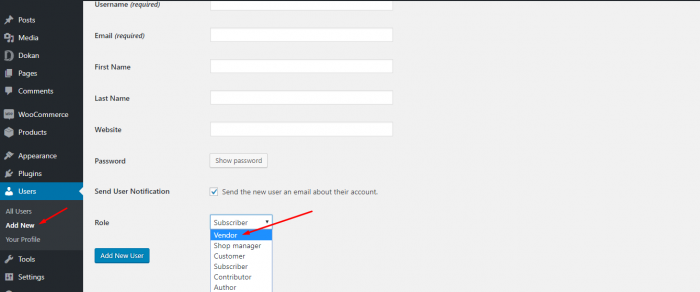
Also, you can create a new vendor in the Dashboad by go to Users > Add New and create an user with Vendor Role.
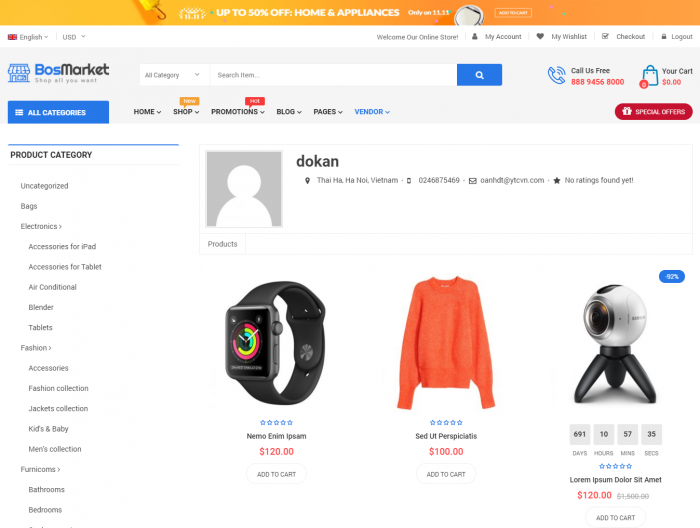
To see vendor store page add /store/vendor to the last part of your URL.
Congrats! You successfully create a marketplace for WordPress site. You can play more with various features of the multi-vendor plugins in your site to complete your world.
Above are some simple steps on how to create an online marketplace or multi-vendor for WordPress site. WPThemeGo really hope that with this article is helpful for you.
You can also check Best MarketPlace WordPress Themes with demo ready for more references.

